Quick guide
Getting started
Tap on the icon 
If a Mac is used, make sure "Mac OS X screen sharing" is enabled. Hereafter use section
"Server configuration" to define which Mac or PC to use.
At the top of the screen is an icon  . Tap it, to make a connection to your Mac or PC.
Barcode to text

Use the camera to scan barcodes.
 If the barcode cannot be scanned, type the barcode manually.
 Turn on/off the light.
 Cancel the scanning.
Image to text
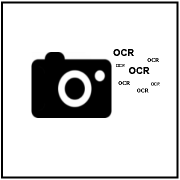
Use the camera as a OCR reader, and convert an image to simple text.
- Holding the iPad/iPhone in portrait mode, gives the best result.
- Make sure the text is horizontal.
- Use a clear white background and a black font.
- Select only the area with text to translate.
 Start processing the image.
  Select an area to use. A smaller area gives a faster result.
  Rotate image to the right. The text must be horizontal before it can be processed.
 Rotate image to the left. The text must be horizontal before it can be processed.
 - Cancel the scanning.
Speech to text
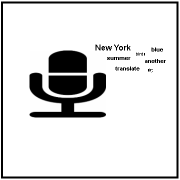
Use the screen keyboard or the speech to text (Siri) function to input text.
Mac configuration
- Mac IP address or name:
Name of the Mac computer. Either:
- A TCP/IP address as 192.168.2.1
- DNS name as funfun.no-ip.org
- NETBIOS name. Must start with a /
- Bonjour name. Must start with a #
Use the blue (i) icon to make a local network search.
- Port number:Port number for the session. As default Mac OS X uses port 5900.
- Mac OS X User ID:It is the normal user ID on the Mac. Both the user ID and password are send in a 128 bit encryption frame.
- Mac OS X password: Password for the above user. If the user is defined without a password on the Mac, use a single # character.
Keep this field empty, and Mocha Input will request the password on every connect request.
- Keyboard: Type of keyboard on the Mac.
- Auto connect: If a session should be started when the App starts.
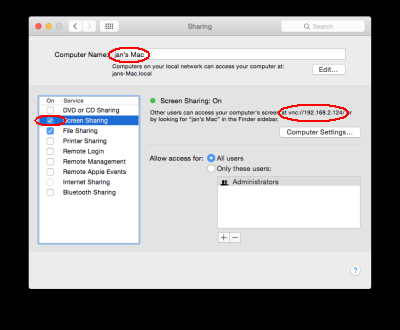
Screen sharing configuration
In Mac OS X System Preferences, select Sharing
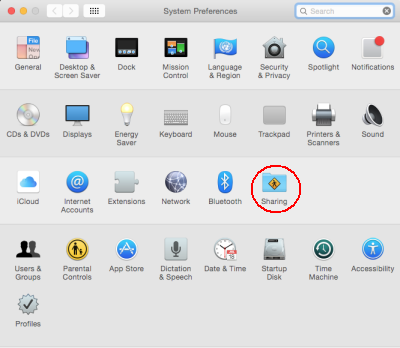
Enable Screen Sharing
The IP address and bonjour name for the Mac can also be seen in the window.
PC configuration
- PC IP address or name:
Name of the VNC server. Either:
- A TCP/IP address as 192.168.2.1
- DNS name as funfun.no-ip.org
- NETBIOS name. Must start with a /
Use the blue (i) icon to make a local network search.
- Port number:Port number for the session. As default Windows servers use port 5900, and Linux/UNIX port 5901.
- VNC password:VNC Server password. A password is send encrypted on session start.
Keep this field empty, and Mocha Input will request the password on every connect request. (# = none).
- Auto connect: If a session should be started when the App starts.
VNC Server
On the PC install a VNC server
There are 3 major VNC servers for Windows XP,7/8/10 and Vista:
Barcode Preferences
- Barcode types: List of supported barcodes.
- Beep: Sound is used after the scan has been completed
- Vibrate: Device will vibrate after the scan has been completed
- Barcode ignore first : Do not read the first character in a barcode scanning.
- Barcode ignore last : Do not read the last character in a barcode scanning.
- Send ENTER after a barcode scan : Action to take after a single scan.
- Send TAB after a barcode scan : Action to take after a single scan.
- Save barcodes to history: always write a copy to the history container.
OCR Preferences
- OCR language: Select language for the text to translate.
- Using existing Photo: If a pop up menu should be shown, as to select if photo from iOS "Photos" should be used
- Barcode configuration: How to process barcode data.
- Remove empty lines: If the scanner should ignore empty lines in the result.
