Getting Started
Before making a session, basic information as IP address for the AS/400 server must be defined.
In mocha tn5250, click on text "configure" in the toolbar.
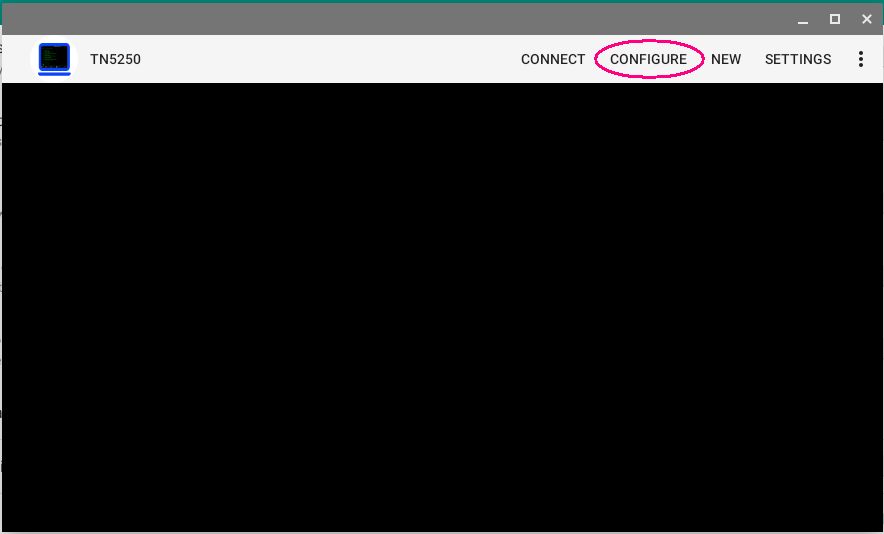
Configure AS/400
A list of already defined configurations is shown. If it is a new installation a "New" configuration is at the top of the list.
Click it to start adding data to the configuration. To add a new configuration, use "New" in the tool bar.
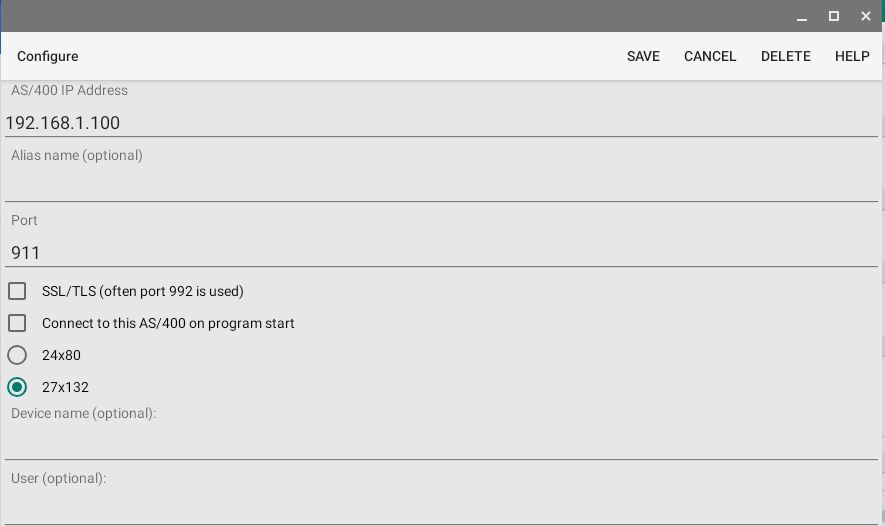
- IP Address: Name of the AS/400 Server. Either a TCP/IP address as 155.22.11.2 or a DNS name.
- Name: Give the session configuration a name, as it is easier to remember
than the IP address. The name will be shown in the toolbar, when in session with an as/400. If the name field is empty, the IP address will be shown.
- Port number: Port number for the session. As default TN5250 uses port 23 and with SSL/TLS port 992.
- SSL/TLS: If the SSL/TLS protocol stack included with Chromebook should be used.
- Connect to this AS/400 on program start: It is possible to define one session to start at program load.
It is not possible to start many windows automatically.
- Termtype: Terminal type, either 24x80 or 27x132.
IBM-3477-FC : 27x132 color display
IBM-3179-2 : 24x80 color display
- Device name : An optional device name can be used for a session.
- User : This is the user name on the AS/400 server (optional).
- Password : This is the password for the user on the AS/400 server (optional). Notice it gives very limited security to write the password in the configuration. It is much better to type the password at each session start.
- Auto login : TN5250 will send user and password text to the AS/400 sign on screen.
- Send keep alive : In a proper working network, tn5250 should not send keep alive, lower level protocols will handle it. This option send an extra keep alive every 10 second.
- EBCDIC codepage : Must be the same as on the AS/400.
Connect
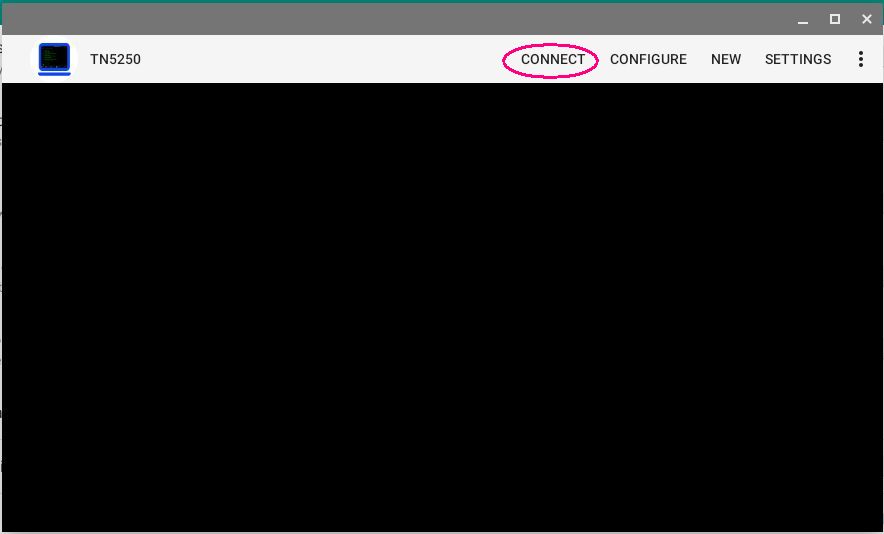
To start a session with the AS/400 , click on "Connect" in the toolbar. If there are more than one session defined, a list will be shown.
New
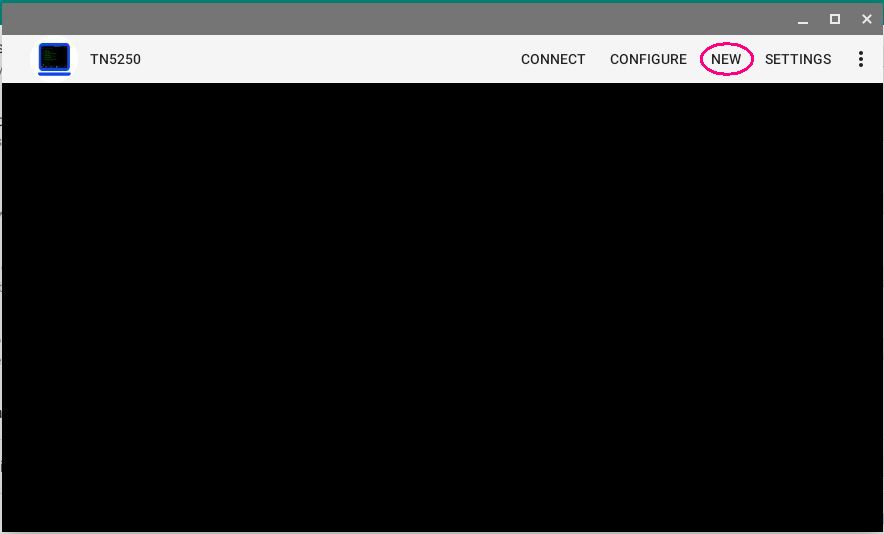
To open more than one 5250 Window, click on "New" in the toolbar. When in a session with the AS/400, there is also a "New" option in the toolbar.
Settings
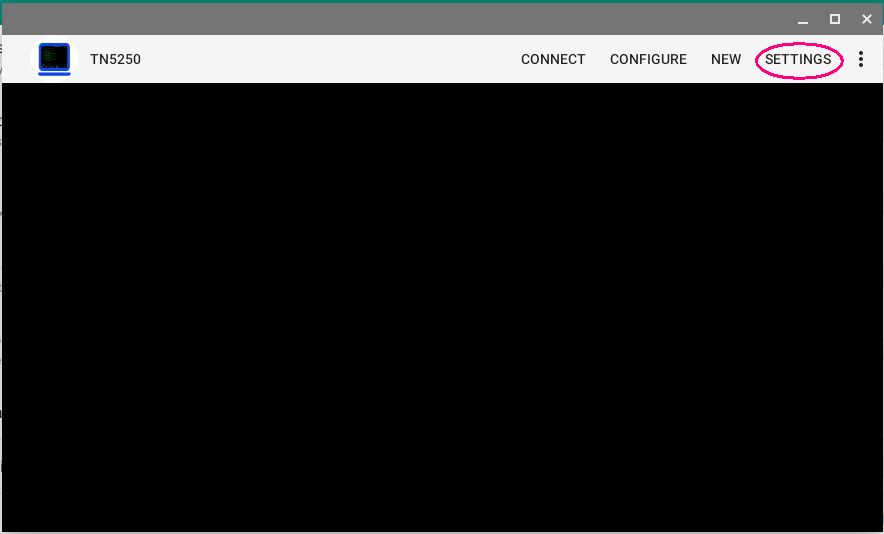
Settings is used to define configuration elements shared between all AS/400 configurations.
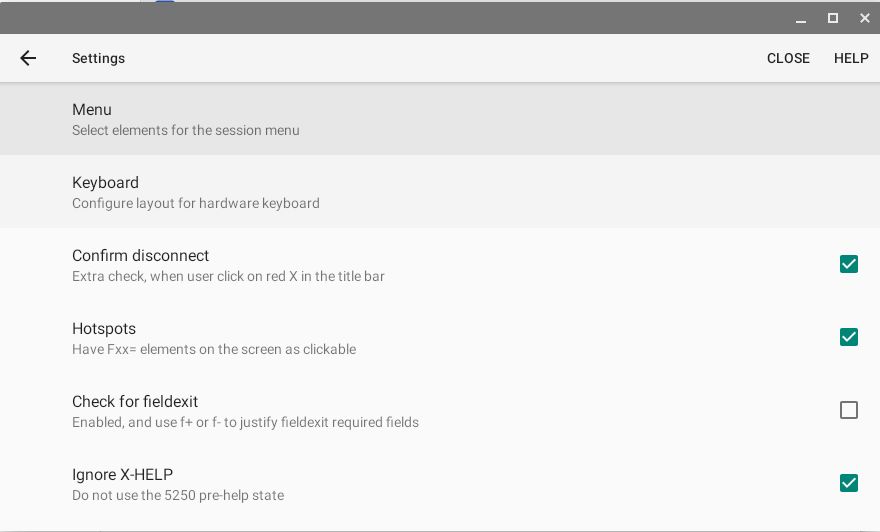
- Menu: Select which Menu elements should be shown in the toolbar, and the position.
- Keyboard: Layout for the hardware keyboard.
- Confirm disconnect: When the red X icon is clicked in the toolbar a confirm dialog can be shown.
- Hotspots: Text Fxx and URL's can be clicked.
- Check for fieldexit: If the 5250 emulator should use or ignore the fieldexit required field type.
- Ignore X-HELP: If the 5250 terminal should be able to enter a pre-help state. Press RESET to continue, or HELP for details.
- Make a sound: If typing in a protected area or pre-help mode is activated, a beep sound is used.
- Display field separator: A field can include a field separator display option. Will be shown as a dot.
- 2 x mouse click = ENTER: Either the click is select word or ENTER.
- Block cursor: Either a block or a slim line cursor.
- Colors: It is the AS/400 program, which defines the text colors to use in a screen.
The AS/400 can as an example, request a red text, and the color red can be configured in this dialog.
Show keyboard layout
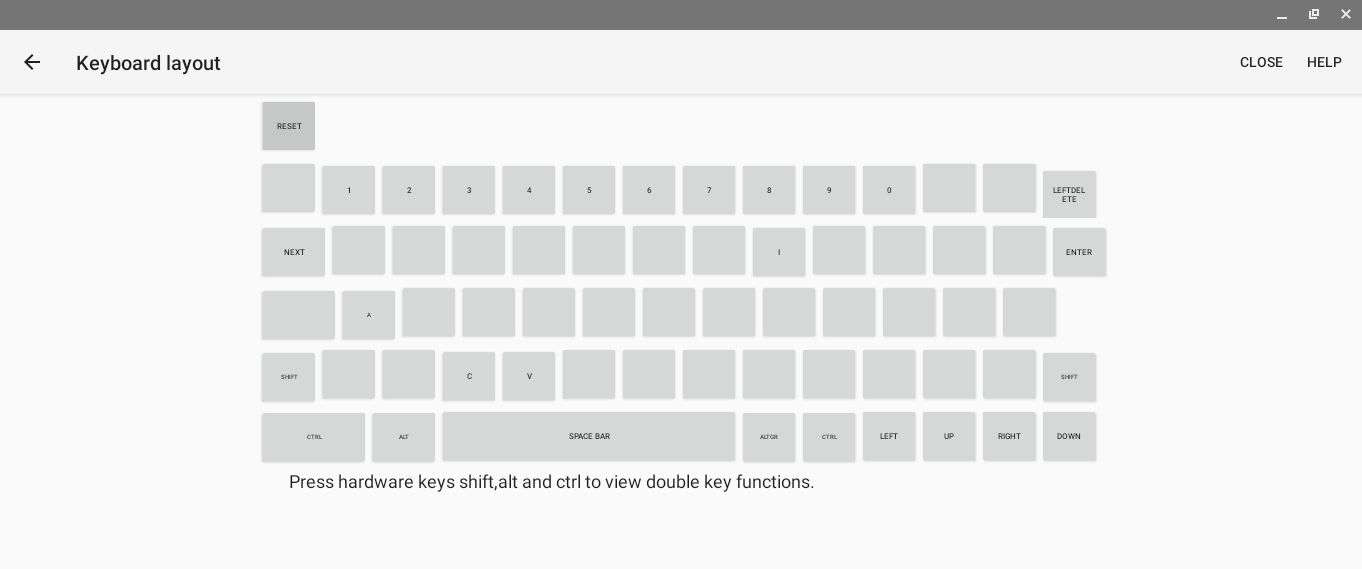
Press hardware keys SHIFT, ALT and CTRL to view the current mapping.
Fxx keys on a Chromebook
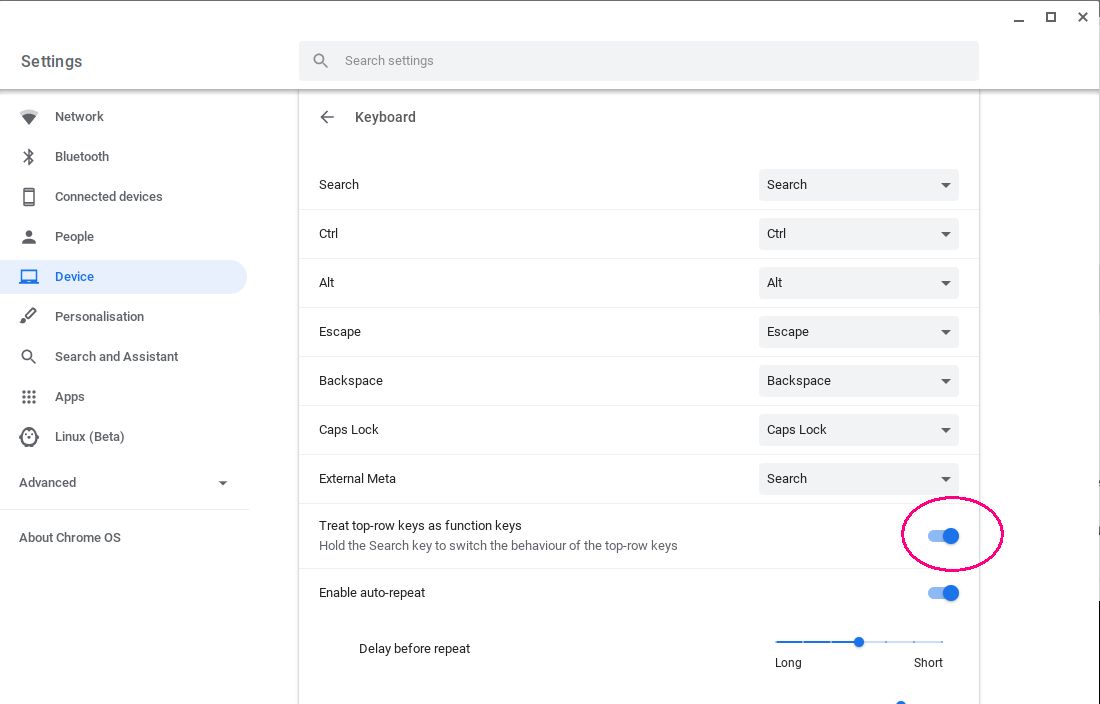
It is possible to configure the Chromebook to have F1 - F10 at the top row, next to ESC.
In Chromebook OS settings, enable Device , Keyboard , Treat top-row keys as function keys
In session
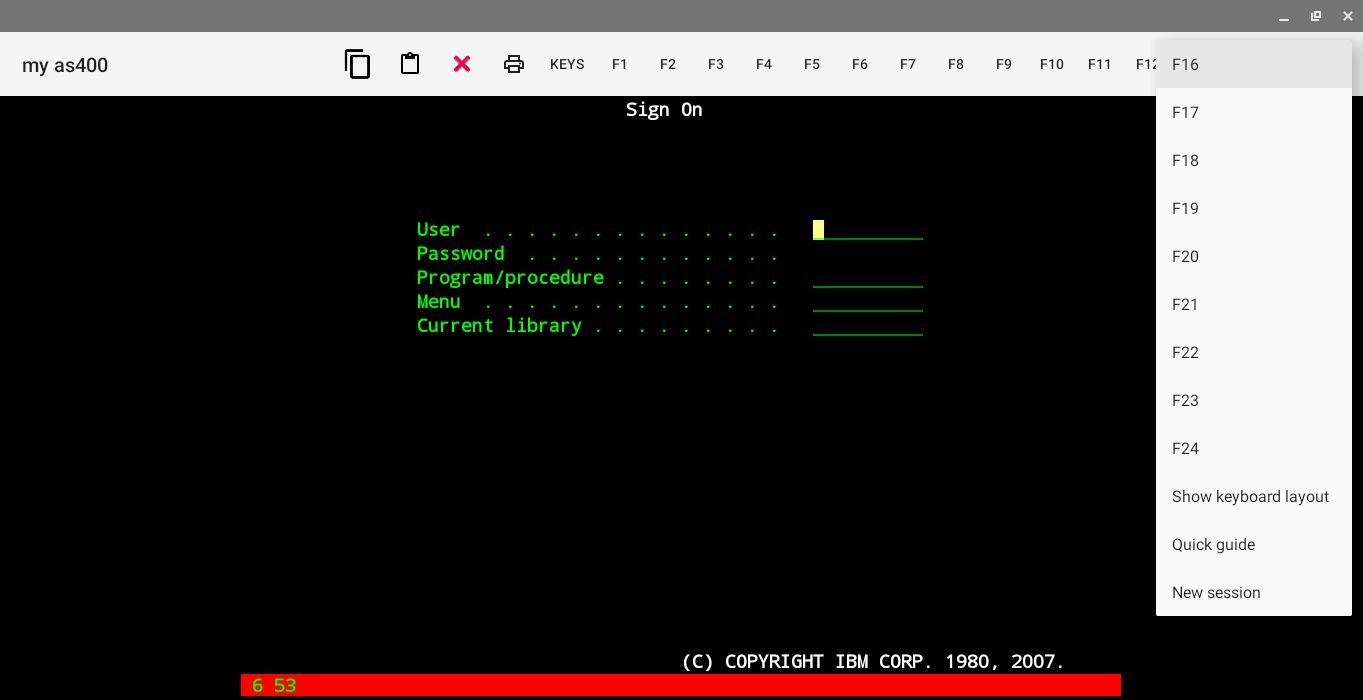
The TN5250 terminal has as default a set of function keys in the toolbar. Which and the order can be configured in settings.
 : Copy selected area to the clipboard.
 : Paste text from the clipboard to the cursor position.
 : Disconnect the session.
 : Copy current screen to a printer.
- Keys: Pop up extra keys, which where disabled in tn5250 - settings - menu.
- F1 - F24: Standard 5250 function keys.
- Show keyboard layout: Pop up a screen with the current hardware keyboard layout.
- Quick guide: Give a short guide to keys and status line.
- New session: Creates a new 5250 Window.
The red status line can include:
- SSL/TLS status
- Cursor y,x : is the cursor position.
- X-WAIT : Waiting on AS/400.
- LOCK : The AS/400 application has locked the keyboard.
- X-HELP : prehelp state. Press keys Reset or Help to continue. It is possible to disable X-HELP mode in menu - Settings - ignore x-help
- X-FER : Use Fieldexit to leave this field. It is possible to disable this function in menu - Settings - check for fieldexit.
- X-ERROR : Typing at a not valid position on the screen.
- X-PROG ERROR : Th AS/400 has send data to tn5250, which is not valid.
- INS : Insert mode.
- NumLock : Numlock key has been pressed. Can be used, if a PC keyboard is attached to the Chromebook.
- M : if a message has been received (AS/400 mail system uses this option).
Clipboard
The clipboard can only handle simple text data. Copy/paste tables will in most cases give a wrong result.
Default keyboard layout:
| Key | 5250 Function |
| Left CTRL | RESET |
| Right CTRL | ENTER |
| F1 | F1 |
| F2 | F2 |
| F3 | F3 |
| F4 | F4 |
| F5 | F5 |
| F6 | F6 |
| F7 | F7 |
| F8 | F8 |
| F9 | F9 |
| F10 | F10 |
| F11 | F11 |
| F12 | F12 |
| SHIFT F1 | F13 |
| SHIFT F2 | F14 |
| SHIFT F3 | F15 |
| SHIFT F4 | F16 |
| SHIFT F5 | F17 |
| SHIFT F6 | F18 |
| SHIFT F7 | F19 |
| SHIFT F8 | F20 |
| SHIFT F9 | F21 |
| SHIFT F10 | F22 |
| SHIFT F11 | F23 |
| SHIFT F12 | F24 |
| CTRL 1 | F1 |
| CTRL 2 | F2 |
| CTRL 3 | F3 |
| CTRL 4 | F4 |
| CTRL 5 | F5 |
| CTRL 6 | F6 |
| CTRL 7 | F7 |
| CTRL 8 | F8 |
| CTRL 9 | F9 |
| CTRL 0 | F10 |
| CTRL SHIFT 1 | F11 |
| CTRL SHIFT 2 | F12 |
| CTRL SHIFT 3 | F13 |
| CTRL SHIFT 4 | F14 |
| CTRL SHIFT 5 | F15 |
| CTRL SHIFT 6 | F16 |
| CTRL SHIFT 7 | F17 |
| CTRL SHIFT 8 | F18 |
| CTRL SHIFT 9 | F19 |
| CTRL SHIFT 0 | F20 |
| ALT 1 | F21 |
| ALT 2 | F22 |
| ALT 3 | F23 |
| ALT 4 | F24 |
| ALT 5 | CLEAR |
| ALT 6 | HELP |
| ALT 7 | DUP |
| ALT 8 | PRINT |
| ALT 9 | ERASEINPUT |
| ALT 0 | RECORD |
| SHIFT ALT 1 | FREE |
| SHIFT ALT 2 | FREE |
| SHIFT ALT 3 | FREE |
| SHIFT ALT 4 | FREE |
| SHIFT ALT 5 | FREE |
| SHIFT ALT 6 | FREE |
| SHIFT ALT 7 | FREE |
| SHIFT ALT 8 | FREE |
| SHIFT ALT 9 | FREE |
| SHIFT ALT 0 | FREE |
| CTRL A | SELECT ALL |
| CTRL C | COPY |
| CTRL V | PASTE |
| CTRL I | INSERT |
| KEYPAD PLUS | FIELDEXIT |
| KEYPAD MINUS | REALMINUS |
| KEYPAD ENTER | FIELDEXITENTER |
| HOME | BEGIN |
| END | END |
| BACKSPACE | LEFTDELETE |
| DELETE | DELETE |
| ESC | RESET |
| CTRL ESC | ATTN |
| ALT ESC | SYSREQ |
| INSERT | INSERT |
| PGUP | PGUP |
| PGDN | PGDN |
| ENTER | ENTER |
| SHIFT ENTER | NEWLINE |
| ALT ENTER | FIELDEXITENTER |
| CTRL ENTER | FIELDEXIT |
| TAB | NEXT |
| SHIFT TAB | PREVIOUS |
| ARROW LEFT | LEFT |
| CTRL ARROW LEFT | BEGIN |
| SHIFT ARROW LEFT | SELECT LEFT |
| ALT ARROW LEFT | BEGIN |
| ARROW RIGHT | RIGHT |
| CTRL ARROW RIGHT | END |
| SHIFT ARROW RIGHT | SELECT RIGHT |
| ALT ARROW RIGHT | END |
| ARROW UP | UP |
| CTRL ARROW UP | PGUP |
| SHIFT ARROW UP | SELECT UP |
| ALT ARROW UP | PGUP |
| ARROW DOWN | DOWN |
| CTRL ARROW DOWN | PGDN |
| SHIFT ARROW DOWN | SELECT DOWN |
| ALT ARROW DOWN | PGDN |
Some of the above keys exist only on a PC keyboard.
Search key
Some Chromebooks has a search key , where a normal PC keyboard has Capslock.
The search key function can be defined in Chrome OS - Settings - Device - Keyboard.
If the Search key is defined as Search, the double keys are:
- Search + 1 .. Search + = Function keys F1 through F12
- Search + backspace Delete
- Search + . Insert
- Search + Left arrow Home
- Search + Right arrow End
- Search + Up arrow Page up
- Search + Down arrow Page down
- Search + Esc Launch task manager


 : Copy selected area to the clipboard.
 : Paste text from the clipboard to the cursor position.
 : Disconnect the session.
 : Copy current screen to a printer.