Getting Started
Before making a session, basic information as IP address for the IBM mainframe server must be defined.
In mocha TN3270, click on text "configure" in the toolbar.
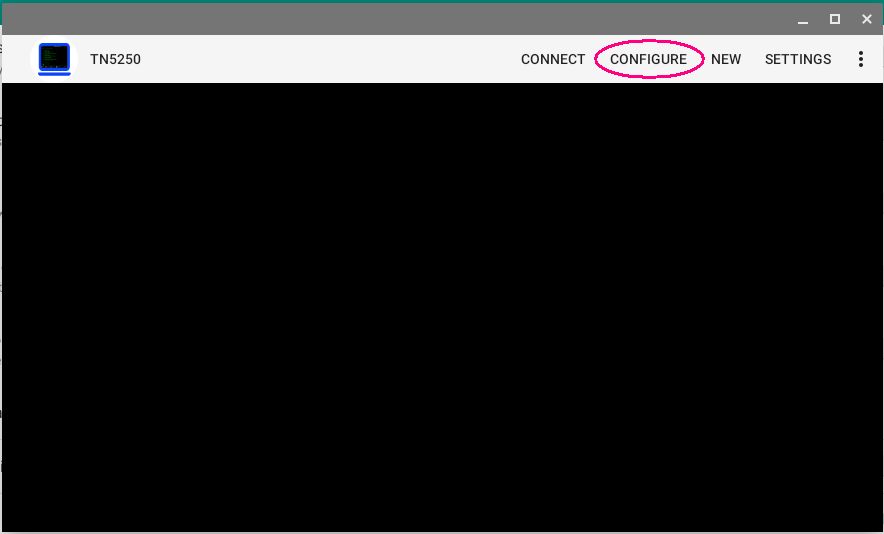
Configure IBM mainframe
A list of already defined configurations is shown. If it is a new installation a "New" configuration is at the top of the list.
Click it to start adding data to the configuration. To add a new configuration, use "New" in the tool bar.
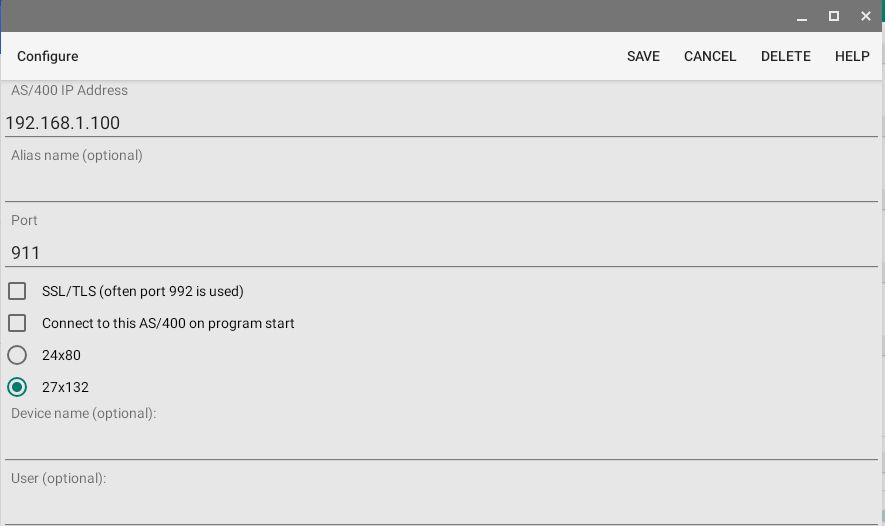
- IP Address: Name of the IBM mainframe Server. Either a TCP/IP address as 155.22.11.2 or a DNS name.
- Name: Give the session configuration a name, as it is easier to remember
than the IP address. The name will be shown in the toolbar, when in session with an IBM mainframe. If the name field is empty, the IP address will be shown.
- Port number: Port number for the session. As default TN3270 uses port 23 and with SSL/TLS port 992.
- SSL/TLS: If the SSL/TLS protocol stack included with Chromebook should be used.
- Connect to this IBM mainframe on program start: It is possible to define one session to start at program load.
It is not possible to start many windows automatically.
- Termtype: Terminal type, either 24x80 or 32x80.
- Device name : An optional device name can be used for a session.
- User : This is the user name on the IBM mainframe server (optional).
- Password : This is the password for the user on the AS/400 server (optional). Notice it gives very limited security to write the password in the configuration. It is much better to type the password at each session start.
- Auto login : TN3270 will send user and password text to the IBM mainframe sign on screen.
- Send keep alive : In a proper working network, TN3270 should not send keep alive, lower level protocols will handle it. This option send an extra keep alive every 10 second.
- EBCDIC codepage : Must be the same as on the IBM mainframe.
Connect
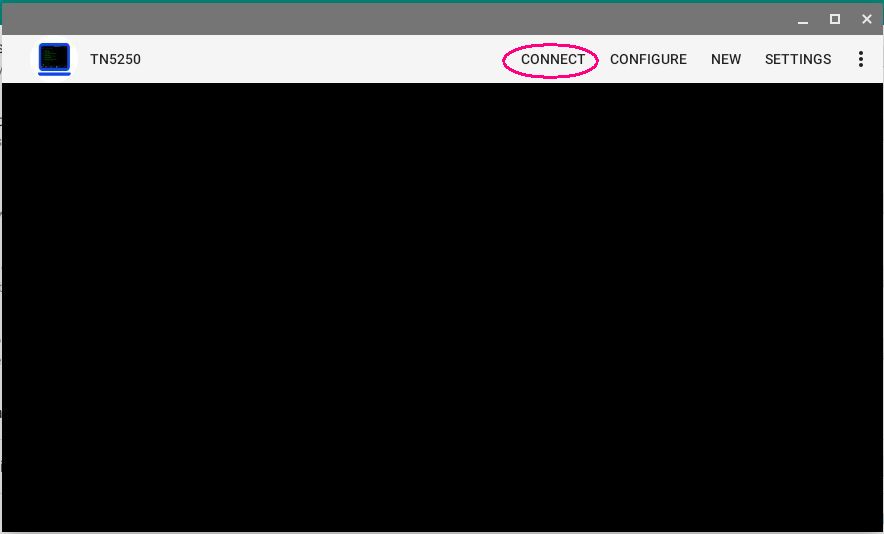
To start a session with the IBM mainframe , click on "Connect" in the toolbar. If there are more than one session defined, a list will be shown.
New
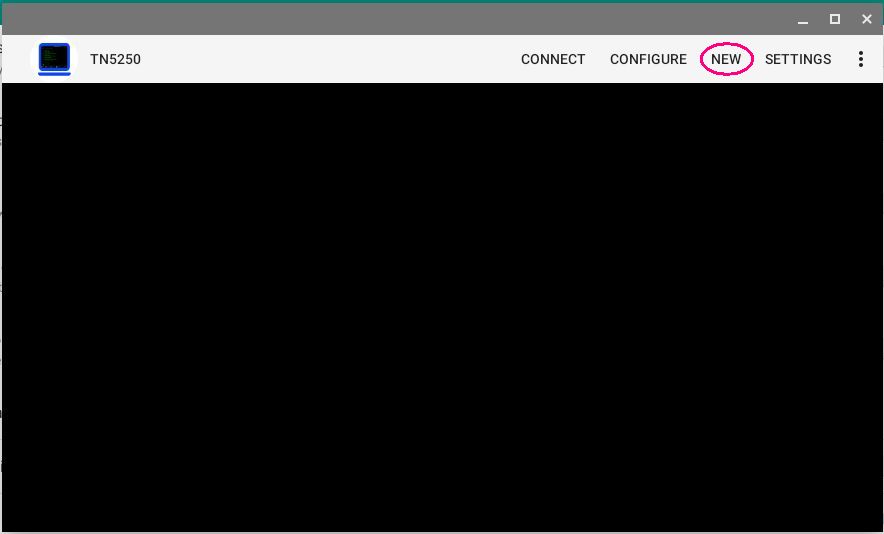
To open more than one 3270 Window, click on "New" in the toolbar. When in a session with the IBM mainframe, there is also a "New" option in the toolbar.
Settings
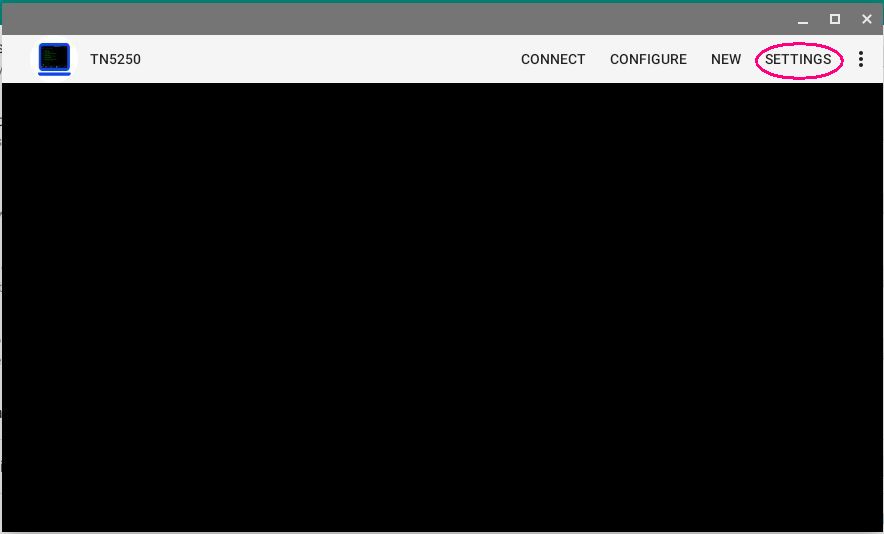
Settings is used to define configuration elements shared between all IBM mainframe configurations.
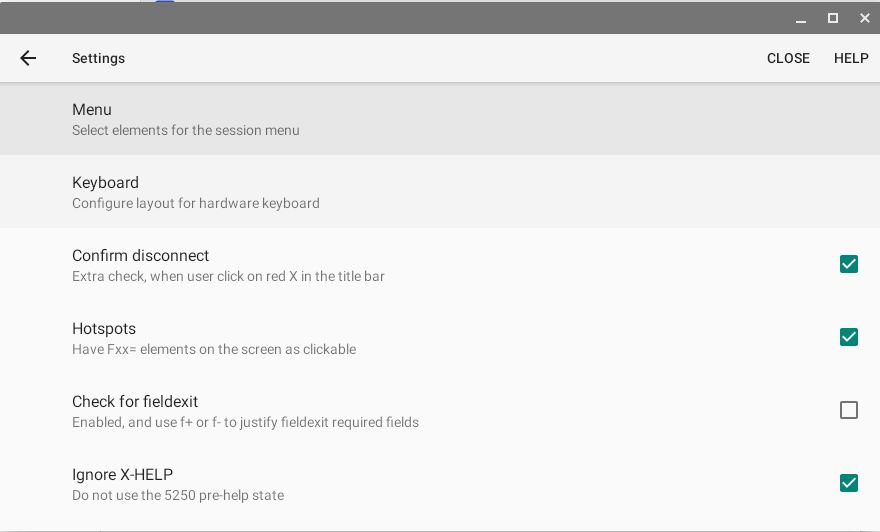
- Menu: Select which Menu elements should be shown in the toolbar, and the position.
- Keyboard: Layout for the hardware keyboard.
- Confirm disconnect: When the red X icon is clicked in the toolbar a confirm dialog can be shown.
- Hotspots: Text Fxx and URL's can be clicked.
- Check for fieldexit: If the 3270 emulator should use or ignore the fieldexit required field type.
- Ignore X-HELP: If the 3270 terminal should be able to enter a pre-help state. Press RESET to continue, or HELP for details.
- Make a sound: If typing in a protected area or pre-help mode is activated, a beep sound is used.
- Display field separator: A field can include a field separator display option. Will be shown as a dot.
- 2 x mouse click = ENTER: Either the click is select word or ENTER.
- Block cursor: Either a block or a slim line cursor.
- Colors: It is the IBM mainframe program, which defines the text colors to use in a screen.
The IBM mainframe can as an example, request a red text, and the color red can be configured in this dialog.
Show keyboard layout
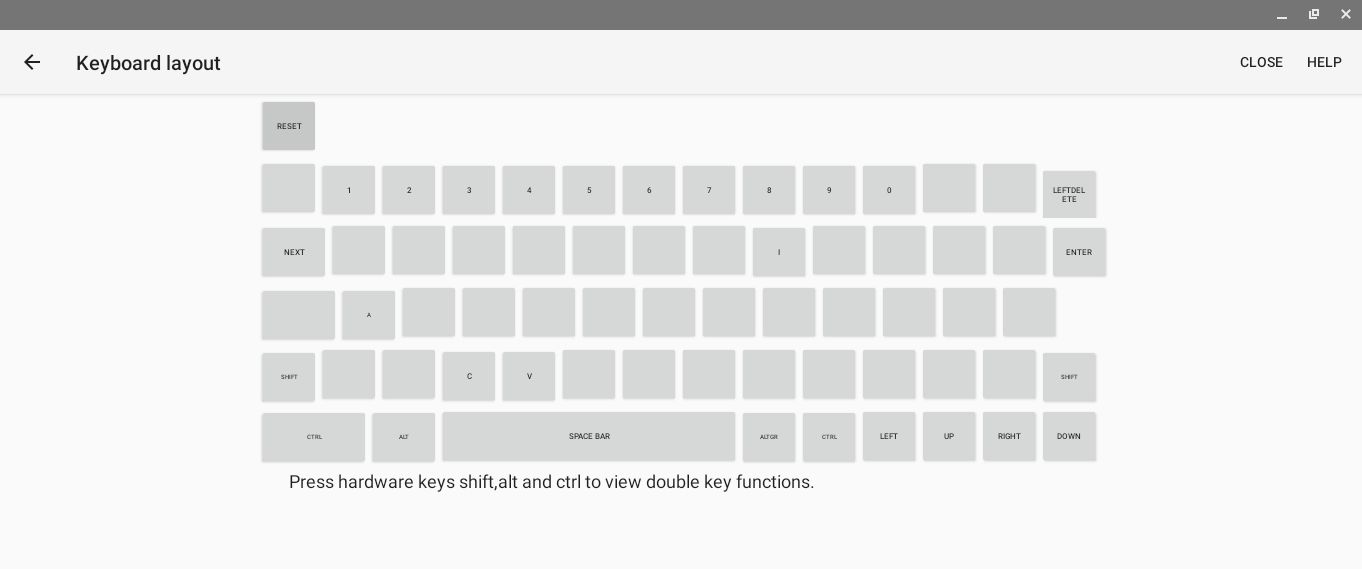
Press hardware keys SHIFT, ALT and CTRL to view the current mapping.
Fxx keys on a Chromebook
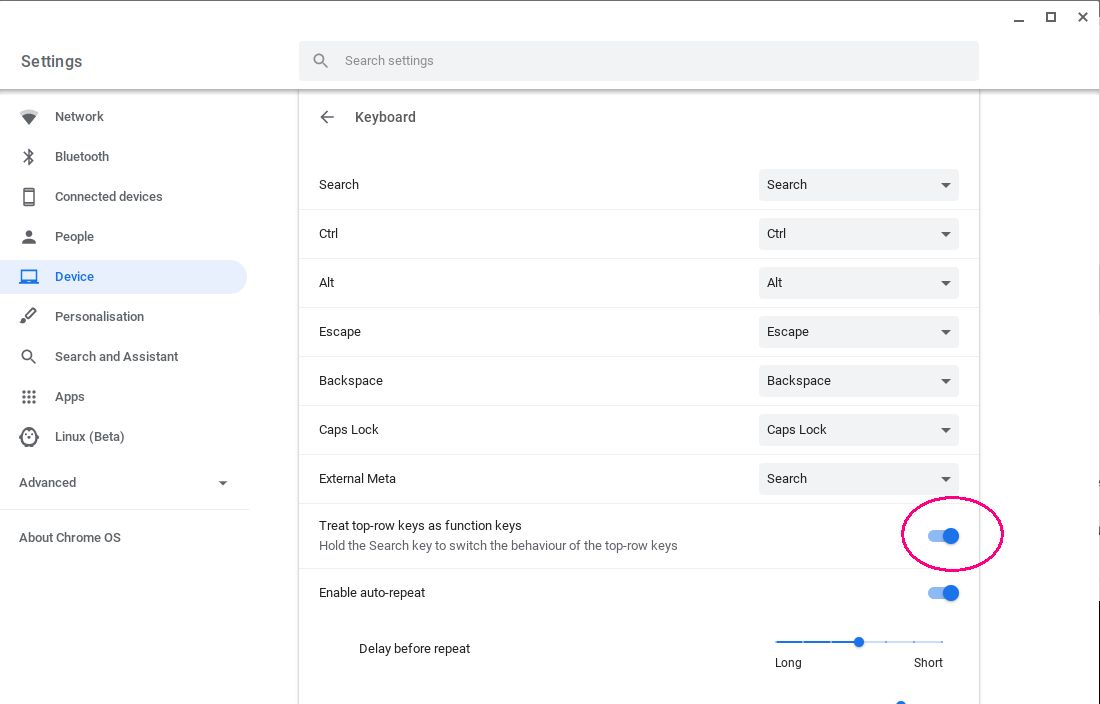
It is possible to configure the Chromebook to have F1 - F10 at the top row, next to ESC.
In Chromebook OS settings, enable Device , Keyboard , Treat top-row keys as function keys
In session
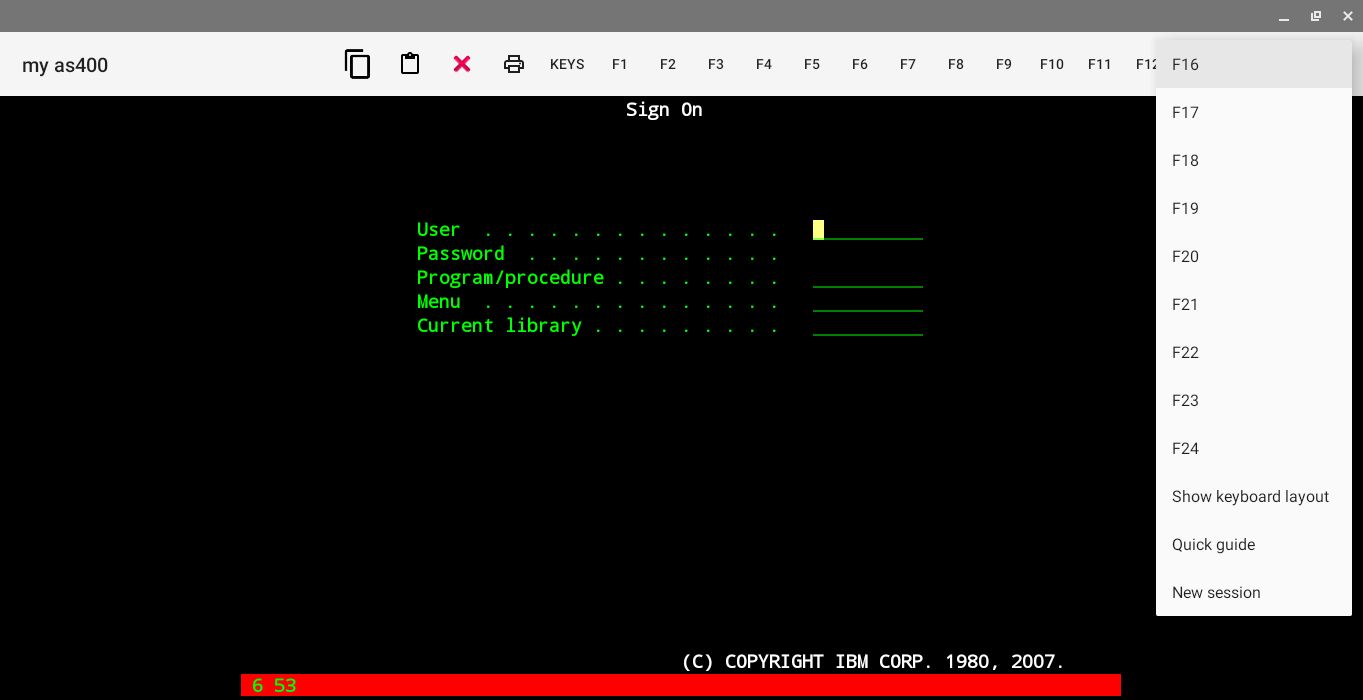
The TN3270 terminal has as default a set of function keys in the toolbar. Which and the order can be configured in settings.
 : Copy selected area to the clipboard.
 : Paste text from the clipboard to the cursor position.
 : Disconnect the session.
 : Copy current screen to a printer.
- Keys: Pop up extra keys, which where disabled in TN3270 - settings - menu.
- F1 - F24: Standard 3270 function keys.
- Show keyboard layout: Pop up a screen with the current hardware keyboard layout.
- Quick guide: Give a short guide to keys and status line.
- New session: Creates a new 3270 Window.
The red status line can include:
- SSL/TLS status
- Cursor y,x : is the cursor position.
- X-WAIT : Waiting on IBM mainframe.
- LOCK : The IBM mainframe application has locked the keyboard.
- X-HELP : prehelp state. Press keys Reset or Help to continue. It is possible to disable X-HELP mode in menu - Settings - ignore x-help
- X-FER : Use Fieldexit to leave this field. It is possible to disable this function in menu - Settings - check for fieldexit.
- X-ERROR : Typing at a not valid position on the screen.
- X-PROG ERROR : The IBM Mainframe has send data to TN3270, which is not valid.
- INS : Insert mode.
- NumLock : Numlock key has been pressed. Can be used, if a PC keyboard is attached to the Chromebook.
Clipboard
The clipboard can only handle simple text data. Copy/paste tables will in most cases give a wrong result.
Default keyboard layout:
| Key | 3270 Function |
| Left CTRL | RESET |
| Right CTRL | ENTER |
| F1 | F1 |
| F2 | F2 |
| F3 | F3 |
| F4 | F4 |
| F5 | F5 |
| F6 | F6 |
| F7 | F7 |
| F8 | F8 |
| F9 | F9 |
| F10 | F10 |
| F11 | F11 |
| F12 | F12 |
| SHIFT F1 | F13 |
| SHIFT F2 | F14 |
| SHIFT F3 | F15 |
| SHIFT F4 | F16 |
| SHIFT F5 | F17 |
| SHIFT F6 | F18 |
| SHIFT F7 | F19 |
| SHIFT F8 | F20 |
| SHIFT F9 | F21 |
| SHIFT F10 | F22 |
| SHIFT F11 | F23 |
| SHIFT F12 | F24 |
| CTRL 1 | F1 |
| CTRL 2 | F2 |
| CTRL 3 | F3 |
| CTRL 4 | F4 |
| CTRL 5 | F5 |
| CTRL 6 | F6 |
| CTRL 7 | F7 |
| CTRL 8 | F8 |
| CTRL 9 | F9 |
| CTRL 0 | F10 |
| CTRL SHIFT 1 | F11 |
| CTRL SHIFT 2 | F12 |
| CTRL SHIFT 3 | F13 |
| CTRL SHIFT 4 | F14 |
| CTRL SHIFT 5 | F15 |
| CTRL SHIFT 6 | F16 |
| CTRL SHIFT 7 | F17 |
| CTRL SHIFT 8 | F18 |
| CTRL SHIFT 9 | F19 |
| CTRL SHIFT 0 | F20 |
| ALT 1 | F21 |
| ALT 2 | F22 |
| ALT 3 | F23 |
| ALT 4 | F24 |
| ALT 5 | CLEAR |
| ALT 6 | HELP |
| ALT 7 | DUP |
| ALT 8 | PRINT |
| ALT 9 | ERASEINPUT |
| ALT 0 | RECORD |
| SHIFT ALT 1 | FREE |
| SHIFT ALT 2 | FREE |
| SHIFT ALT 3 | FREE |
| SHIFT ALT 4 | FREE |
| SHIFT ALT 5 | FREE |
| SHIFT ALT 6 | FREE |
| SHIFT ALT 7 | FREE |
| SHIFT ALT 8 | FREE |
| SHIFT ALT 9 | FREE |
| SHIFT ALT 0 | FREE |
| CTRL A | SELECT ALL |
| CTRL C | COPY |
| CTRL V | PASTE |
| CTRL I | INSERT |
| KEYPAD PLUS | FIELDEXIT |
| KEYPAD MINUS | REALMINUS |
| KEYPAD ENTER | FIELDEXITENTER |
| HOME | BEGIN |
| END | END |
| BACKSPACE | LEFTDELETE |
| DELETE | DELETE |
| ESC | RESET |
| CTRL ESC | ATTN |
| ALT ESC | SYSREQ |
| INSERT | INSERT |
| PGUP | PGUP |
| PGDN | PGDN |
| ENTER | ENTER |
| SHIFT ENTER | NEWLINE |
| ALT ENTER | FIELDEXITENTER |
| CTRL ENTER | FIELDEXIT |
| TAB | NEXT |
| SHIFT TAB | PREVIOUS |
| ARROW LEFT | LEFT |
| CTRL ARROW LEFT | BEGIN |
| SHIFT ARROW LEFT | SELECT LEFT |
| ALT ARROW LEFT | BEGIN |
| ARROW RIGHT | RIGHT |
| CTRL ARROW RIGHT | END |
| SHIFT ARROW RIGHT | SELECT RIGHT |
| ALT ARROW RIGHT | END |
| ARROW UP | UP |
| CTRL ARROW UP | PGUP |
| SHIFT ARROW UP | SELECT UP |
| ALT ARROW UP | PGUP |
| ARROW DOWN | DOWN |
| CTRL ARROW DOWN | PGDN |
| SHIFT ARROW DOWN | SELECT DOWN |
| ALT ARROW DOWN | PGDN |
Some of the above keys exist only on a PC keyboard.
Search key
Some Chromebooks has a search key , where a normal PC keyboard has Capslock.
The search key function can be defined in Chrome OS - Settings - Device - Keyboard.
If the Search key is defined as Search, the double keys are:
- Search + 1 .. Search + = Function keys F1 through F12
- Search + backspace Delete
- Search + . Insert
- Search + Left arrow Home
- Search + Right arrow End
- Search + Up arrow Page up
- Search + Down arrow Page down
- Search + Esc Launch task manager


 : Copy selected area to the clipboard.
 : Paste text from the clipboard to the cursor position.
 : Disconnect the session.
 : Copy current screen to a printer.